Before starting a new map in Tiled, create a directory for it. Every freeVikings level has to be stored in it's own directory.
Now we can design the map. First you must have some tiles.
I have prepared a very simple set of two tiles for you -
you will find the image in the directory of examples for this chapter:
develop_guide/examples/CH1_FirstMap/simple_tiles.png.
Copy it to the directory you prepared for your new map.
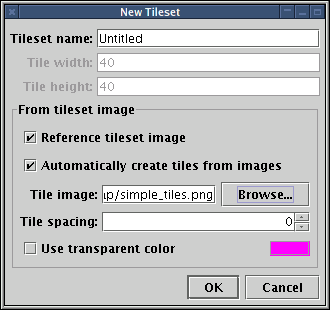
Go to Tiled and create a new map ( → (Ctrl+N)). A dialog will pop up. Change the default values to those you can see on the image below. Tile size 40x40 px is the most common one for freeVikings map (most of freeVikings standard tilesets are made in this tile size and so is also the tileset I prepared for this tutorial). Maps should have at least 16x12 tiles, because a smaller map doesn't fill the game window (and it's so small, that there will be no fun for the vikings I think).

Load the tiles. From menu Tileset choose item New tileset. If you want you can change the Tileset name, but it is of no importance. What is important is to tick the checkbox labelled "Reference tileset image" and then click on the Browse button and find the image with tiles.
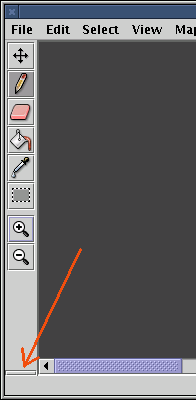
In the bottom-left corner of Tiled window there is a really inconspicuous button (see the screenshot below). Press it.
The window which pops up is a "palette" of loaded tiles. If you have done everything how I told you to, it should look like this:
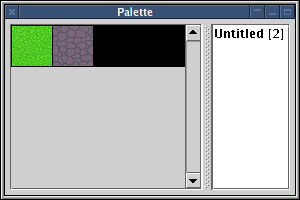
Click on one of the tiles, it automatically occurs on the button which causes the palette to pop up.
Everything is ready, we can make our first map. Choose one of the two tiles (they are awful, I know, I have never had a sense of art), choose the pencil tool from the toolbar on the left and start to design the map.
It could be useful for you to know that Tiled gives you a possibility of zooming (zoom buttons are also in the toolbar). You should always try the menu View, where you can switch on/off highlighting of cursor (not very useful), displaying the grid and coordinate numbers (sometimes useful).
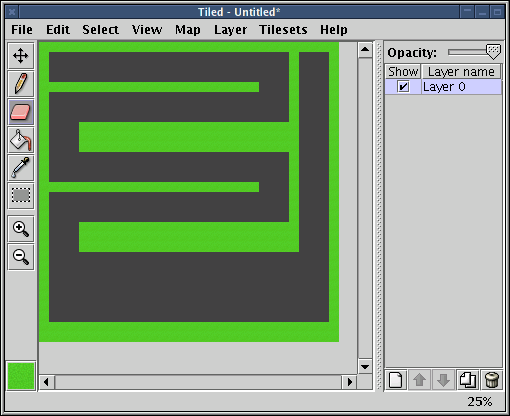
On the screenshot you can see example map which you can find
in directory of examples for this chapter
(develop_guide/examples/CH1_FirstMap/).
It is small (16x12 tiles - i.e. 640 x 480 px, because tile is
40 x 40 px) and has a really stupid idea: vikings start at the
top left corner and go down the stairs until they reach exit,
which will be placed somewhere at the bottom right corner.